Happy Monday everyone! I am not sure why this did not post yesterday.... I am very sorry....
This is such a busy week around here!
Thursday starts the 25 Days of Christmas, where you will see 25 different projects a day around here, all made with Cricut cartridges. There are 30 new Seasonal Design Team members just for this 25 Days of Christmas event! My full time design team is suppoed to take it easy.... but you know them.... they are still at it! Great news I have been feeling much better (as if you couldn't tell with all of my new creations) Thank you all for your support and encouragement through this time with me. I am in the process of moving and launching the webstore.... of yeah, and getting ready for Christmas!!!! Yippie only 27 days away! Bella's birthday is only a few days away too! Just want until next weekend when we do our
Princess Bella's Blog hop!
Now on to today's projects!
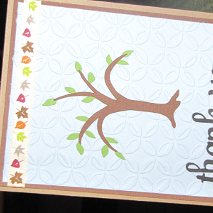
I made this card and see below to see how I made it....
I am sharing this, hopefully it will encourage you to share your work no matter how good or bad it is.... I am sure there will be ONE person out there that might like what you made. Today, I didn't like anything that I made. But I will show you anyway!
Here is how my cards started out.... I started with Santa's Village Cricut Imagine cartridge....
I cut this gable box out and the cute little roof.... Mistake learned (read the book, you need to cut two of these out) I always like to tell you my mistakes so that you do not make them yourself ;)
I still didn't realize that I needed two of these. So I used my Martha Stewart scoring board to score the lines for where the box will fold.
When I realized that I needed two of the first box, I decided to move on to the second box I was going to make. Here is the back after I scored the edges. Do note (this was mistake number two) The window one the left ends up at the BOTTOM of the box, for whatever reason I thought it was at the top where a to: and from: sticker would go. From this view the top is actually the top.
I wanted to have a clear window with some sparkle showing but still have the view to
see the cookies that I was going to put inside. I used red glitter at first in the top right. Then I pulled out some Martha Stewart Green tinsel. That worked perfect and didn't settle to the bottom like the glitter did. The static of the tinsel kept it right where i wanted it.

Here are the little clear envelopes that I used for my clear 'window' You can also put money, tickets hotel keys and many other keepsakes in these and they seal and already have adhesive on them to seal the envelope and to adhere to what you want it to. The problem for me was I wanted a clear 'window' if I had a window and one side had adhesive it needed something to stick to it. So I took a larger one as your can see in the next photo. I put the two sticky sides onto each other. Therefore the sticky side on the small one faced the inside of the treat bag and the larger one's sticky side faced the front of the card. It had enough extra stickiness to adhere to the paper around the window.... But before I sealed it down to the paper, I slid the ribbon through it so you could feel the ribbon from the outside of the treat bag. I put metal sliders in it to form the word SANTA. I am sorry that you cannot see it well in any of these photos. I showed my second failed project on Ustream.

Here is the ribbon under the plastic.
I then decided to whip something quick up and got out my Flower Shoppe Cricut Cartridge. I used the patterns from the Santa's Village cartridge to fill my shapes from Flower Shop. I usually don't know what my end project will look like.... this is just another example of that. I set out to make a treat box and ended up with a card.... It happens every time. Here are the two ink colors that i used to dull down the bright colors from the Santa's Village cartridge. I wanted to match the My Mind's Eye Lost and Found paper, the embellishments are show on the top right. I used Momento Ink and Versa Magic.
I used ZING! Red glitter embossing powders to jazz up my flowers to match the
bright red glitter from the embellishments.
I do not completely over the flower with color or embossing powder. A real flower is not the same color all over, so why should my paper ones be all one color.
Here is what it looked like after I added some gold glitter embossing powder to a few spots on the flower. I always ink and glitter my pieces before i assemble it. Sometimes this is good and sometimes this is bad.
If you glitter something it is hard for adhesive to stick to it.... but if you ink it after you assemble it, you end up sometimes with color or glitter where you do not want it. I just see where I am going to put the adhesive and make sure that I do not glitter or embossing those spots.
Here are the pieces before I inked them. They were all filled with the Santa's Village paper patterns.
Here you can see where I used the VersaMark PEN to draw on the shapes and then I sprinkled the bronze embossing powder on them.... Remember you can always wipe of embossing powder if it is in the wrong place, but you must do this before you heat it.
Here are the flowers when I put them together. I cut random images from flower shoppe at 2" and 3"
I always cut my flowers at 2" and 3" so I never have to think about it. A side note I always cut my characters at 4" again so there is no thought to what size I made an old project from.
Here is a flower with the embossing powder ALL over it. In the next picture you can see where I wiped the powders off BEFORE I heated it. This way it gives it a nice different look.
Here is the finished set after I heated the embossing powders.
Here is the card before I put the flowers on it. For whatever reason I did not like any of these flowers...
In the end I put these flowers on the card and called it a day!
Here is that treat box I was telling you about that the words Santa are upside down.
Here it is from the side view.... hopefully it plays a trick on your mind and
you don't realize that it is upside down (let's keep that our little secret)
Don't forget to "like" my new facebook page.
I will be moving away from the Cricut Craft Room facebook on January 1, 2012