


I have a ton of pictures to show you how I made this card to my mom. We had a blog hop this weekend and I made this card Using my Imagine machine and the new Cricut Flower Shoppe Cartridge and Imagine More Card Cartridge. I used white paper, My Imagine machine, Imagine More Cards Cricut Cartridge, Cricut Flower Shoppe cartridge, my cutting mat adhesive and Misting Pearls! Oh and a set of My Creative Time stamps and Brilliance Inks.
There really was alot to the making of these flowers, so I will show up step by step how to make these and what to do and what to not do :) I learned a few things along the way that I would love to share.
I am going to show you literally step by step how I made this card and more importantly how to make these flowers with the new cartridge. This was a June 2011 release cartridge.
I cut all of these flowers at 2". U filled each of the flowers with the patterns from the Imagine More Cards Cricut cartridge. I did use the Lori's Garden Imagine Cricut cartidge to make the paper behind the 'glass vase' which is actually a acrylic jar from Peachy Keen Stamps. I used the brilliance inks to rub into the little cut lines that are on the 'glass' jar. then i wiped the excess ink off, so it only showed in the groves. This left a little smudge of color all over on the 'glass.' I had wanted to remove ALL of the ink that was not in the grooves.... but it worked perfect and made it seem like it was an old 'glass.' The silliest mistakes make the best projects. So here we go...

I cut all of the pieces for the flowers first. They were cut at 2" for the first flower on this mat I cut 10 of the individual petals. You have to actually look at the sample in the handbook, count the petals to know how many to cut out. I went through and put the number of how many petals I need on the page, so I don't have to count it each time.

While the cut out are still on my mat, I ink them there, less mess on my hands and more even color. I used the Brilliance inks, the Olive, Blue, and Desert Sand.

On these i inked the pink one to look like the color at the throat of flowers (darker toward the middle) for the ones with the olive ink, i wanted to make the tips darker. The blue ink was put at the tips.

You can see where I removed one, but on the purple ones, i inked the tips and down the middle so you can see how the purple one is inked to look like a pansy,that is what it looks like flat, but it will change when it is assembled. I inked the tips of the newprint petals and the tips of the blue ones. On the pink and blue circular images, i inked them, but with how they are cut it perfectly inked the edges of these more than the other parts of them, perfect for what i was looking for. Those will become the middle of the flowers.

Here is what they looked like when I removed the white that was left over after the cricut cut the pieces out.

Same thing here when the extra white is removed.

Here is the other page with the cut outs inked and white removed.

Here is the first flower that I attempted... they got better as I went.
The first thing i had to do was to choose colors and i wanted purple then pink, then purple then pink. You have to look at the colors in the book and how they correspond to the colors you want to use and how they are placed together. I counted 5 petals. Basically the flowers all have 4 'layers' to them.
The center, the coiled part on the picture there are pictures. I set me cut outs below the book so I know where things go, this really helped help the colors and what goes where.

I took the middle and used 3 glue dots to secure this down, I am a person of more adhesive is better :)

Here is the purple with my ink job, it looks rough here, but ended up perfect.
I creased the flower in between each petal and then down the middle of the petal.
To help turn flat paper into a pretty flower.
Here is layer one, two and three.
If you were to look at the book there are images in four quadrants, and how I put these together, they followed a pattern of the top row going left to right, then down then left.... to make it easy.....
1 2
4 3
So the numbers correspond the the images on the handbook, and then from the top (middle coil) to the layer below it then the next layer then he final layer. I found it best to go in this order when assembling them.
The layer that corresponds with my #4 as above. You need to count how many of that color is in the sample. So count them in the sample so you know how many to cut.

You can see how I used glue dots to apply the individual petals to the flower.
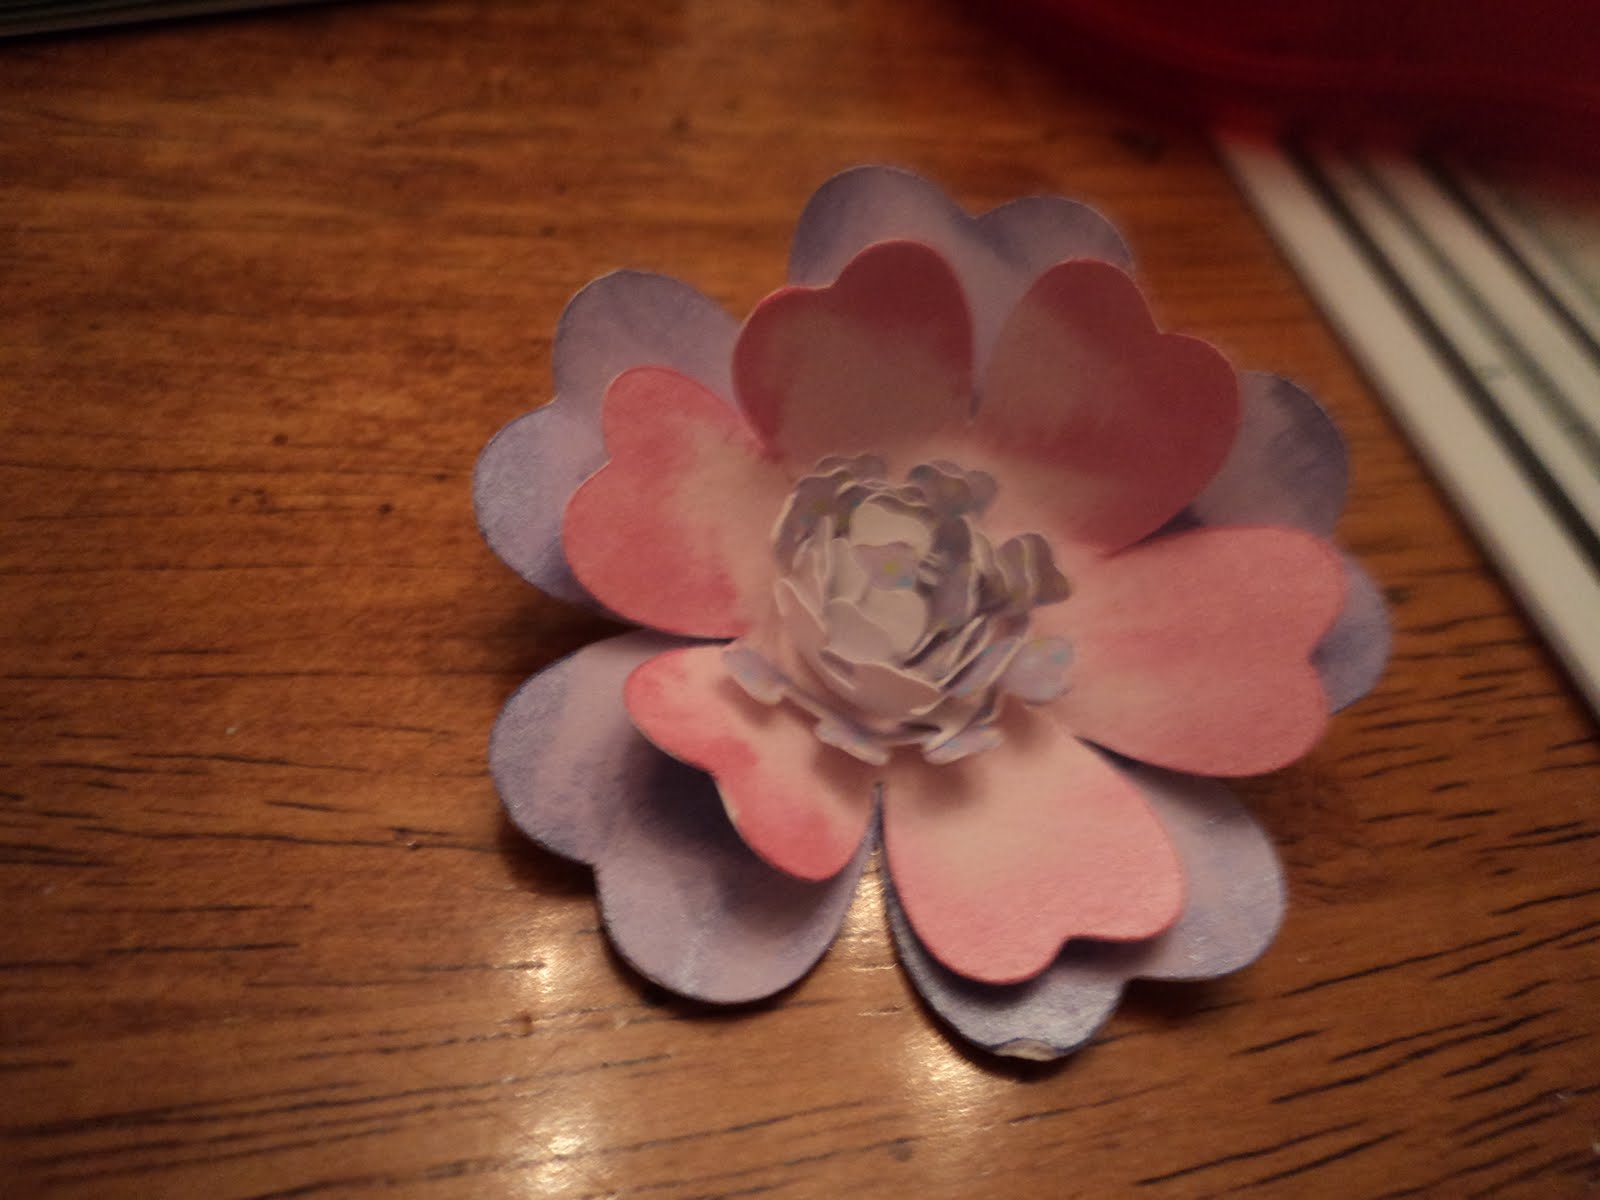
Here is it!

Now you can see how it looks like the book and how the colors coordinate to the sample.

So I found the middles to be slightly difficult, but after two they were very easy. So after you do one or two you should be a master too! There is a circular dot in the middle of each coil. The circular dot is the base then you wrap the rest of the coil around going to the outside of the first dot, your colored side of the paper should face IN. as you can see the white facing out in this picture.

Here is the top view of the coil.
I used a glut dot to secure this tail end to the circle. I made sure when it was put together before adding the glue dot to secure it, i let the coil a little bit loose,t hat way i was able to take my thumb and sort of fan the little pieces outward, so it made it a little softer and opened up.

Here was another one that I laid out like the book, and then i knew what color went where. This made it very easy to put together and see how many of the individual petals.

Here is the center of the next flower. You can see the actual little dot in the middle of this and you can see how I sort of feathered this out so it is not super tight.

I then put a glue dot on the bottom of the dot of the base of the flower center.

here i layer #2

Then here is all of the petals added to the back of the flower.

Here is the back side of what the flower looked like together.

Here is my flower next to the flower in the book.

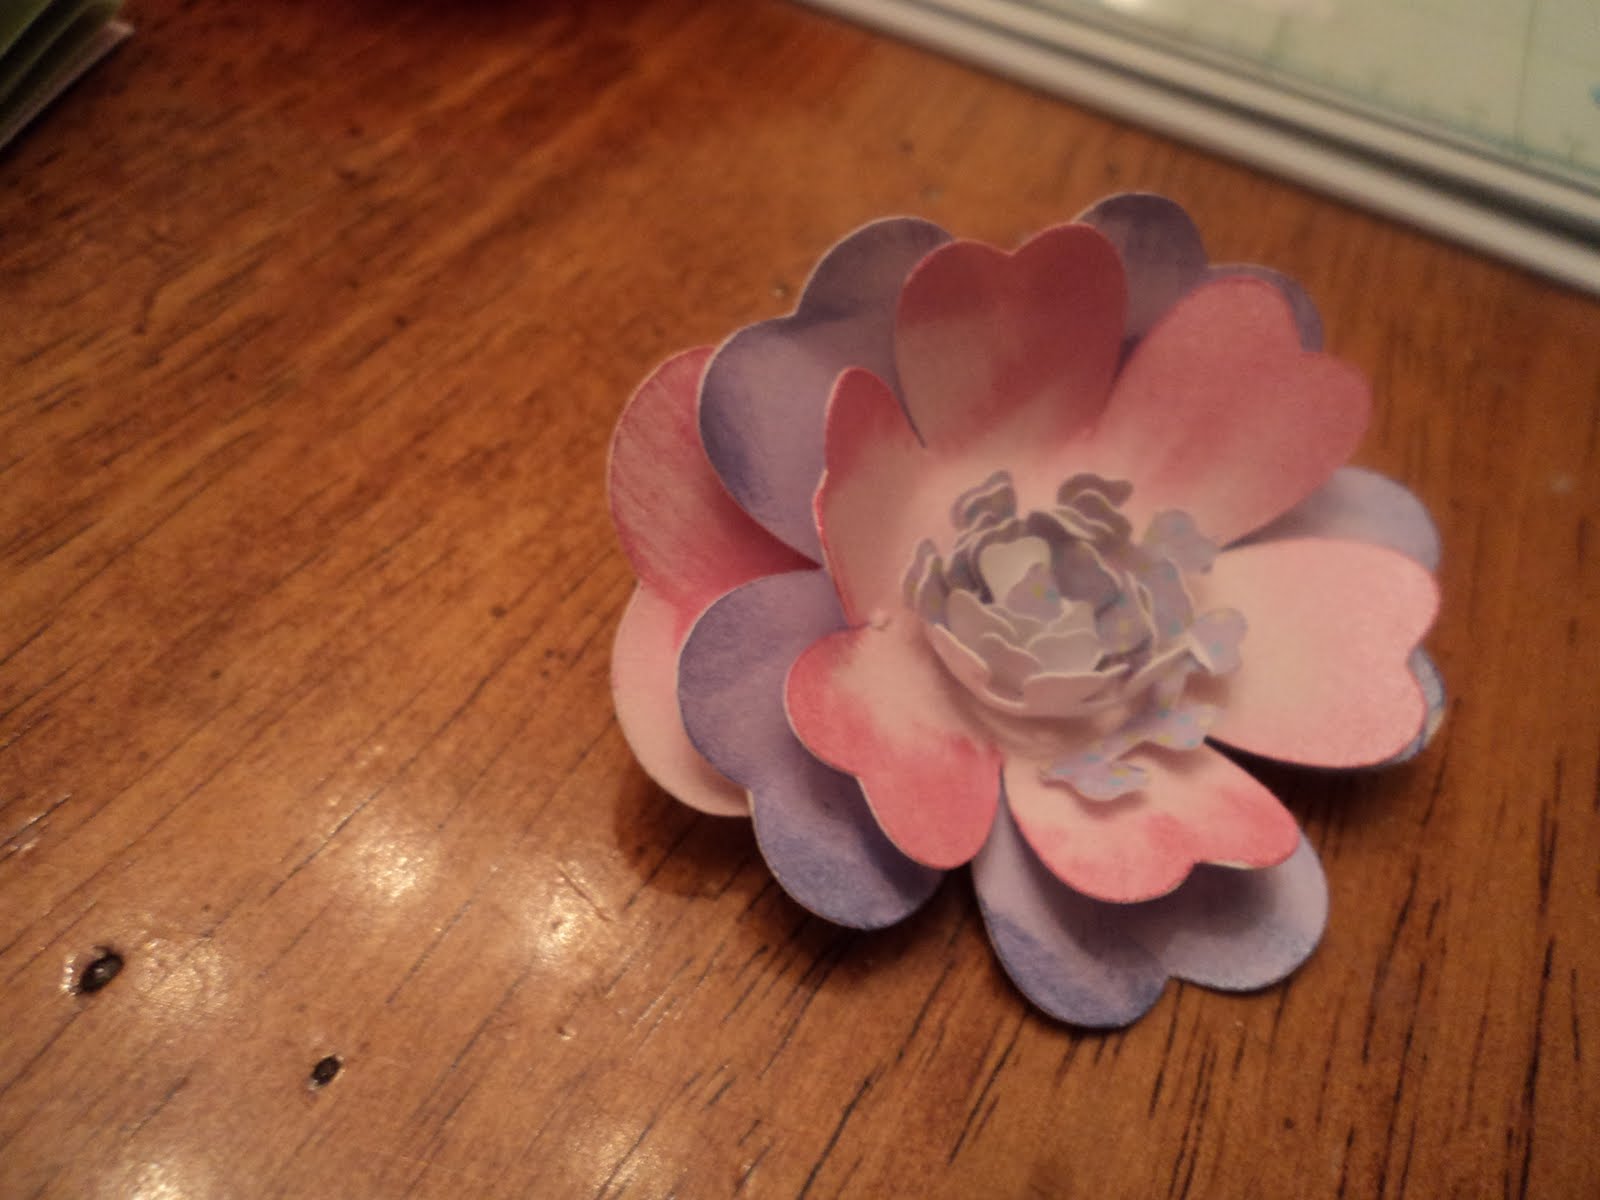
Here is my little collection of flower. I know which ones I really like, and I can take the centers of the ones I really like, with petals of another.... this is great to really make these flowers original.

My Flower garden.

Here was my finished card with my flowers on it. you can see how I took the center off of the one flower, attached a cancer ribbon and then put the center back on it.

All of these papers were from the Imagine More Cards Cricut Cartridge

This sentiment is from Pain, Pain go away, My Creative Time stamps. I used lavender Brilliance inks. the pink is paper printed on the imagine, so it the blue. The purple is actually the same paper from the jar, but with the purple ink used in the flower and the sentiment.

This script paper is from the Lori's Garden Cricut Imagine Cartridge. I just printed a 12x12 piece of paper. I then put the 'glass' jar on the paper, traced it with a pencil. then I put it through the Xyron sticker maker to cover the entire piece of paper in adhesive.

I used the same paper from the jar and used lavender Brilliance Ink and cut them maybe at 1/4" wide. i just eye balled it and cut them thin on my
Your Story Trimmer (which is my favorite paper cutter I have ever used) Some of you ask what my favorite trimmer is, question answered.

I added a little bling to the middle of the flower and used 'frost' shimmer spray to finish this off.

You can see how i folded the newprint paper between each petal and down the middle of each one,
to give it a life-like look.

Here is where i tried to sneak in the ribbon for my mom. I am actually sending this card to her and she has her appointment this week to find out her prognosis with her cancer. Say prayers on July 19, 2011 please.

I used the blue pattern on the imagine to make my card. I usually buy the premade cards and then decorate them, but this one was special, so, so was my paper.
I hope you enjoyed this and have a chance to check out what my design team has made with their Imagine machines also!
4 comments:
Fantastic Job Erica!! Thanks for taking the time to share in detail how you made that card, even though you do not feel the greatest. Miss you Sis and Give Bella a kiss from her auntie. Take care of yourself, and I want this cartridge so bad!!
Absolutely awesome Erica! Your Mother will love this...by the way hope she (and you) are doing well.
beautiful card! Thanks 4 sharing
So glad you shared this with us again...I was not a follower way back then so I missed this post!
Post a Comment