A few projects from Erica....
I had SO MUCH fun creating these projects to share with you. I am in love with the new Cricut Iron-On vinyl. I just love the adorable things that I have made with it.
My biggest bit of advice.... don't forget to FLIP your images so that they come out correct.
Another tip... the shiny side of the vinyl (the plastic coated side should go face down on your cutting mat)
I used Boho-Graphics to create this unique and personalized purse. I used Cricut iron-on glitter in black and silver.
If you are wondering how the silver detail was done... I took the image and copy and pasted it then I moved it up and to the right a bit, so the red and black in this picture were both cut, then what you see in red was what I cut out of the silver. I put the black on first, just as the black is shown in this image.... But I cut what is RED from the silver glitter Cricut Iron-On. I intentionally did not match it up, I wanted to see the red of the purse between the black and silver vinyl for a totally unique and custom look!
I used a Thirty-One skirt purse to add this design. I also am a consultant for Thirty-One if you just love this purse (you can change the red part of the purse to other colors)
Here is my version of a not so matchy/matchy Mother-Daughter set of t-shirts.
I used Kate's ABC's for the text with the pink cricut iron-on lite vinyl.
I used Cricut iron-on glitter in silver with Kate's ABC's for the "&" sign.
I used Cricut iron-on glitter in black with Cricut Boho-Graphics for the "mother/daughter" whales.
I didn't want to overdo it with the "Princess" thing, so here is an understated princess yet so cute!!!
I used Brooklyn Iron-On for the "photo" and Cricut Wedding for the crown. I used Kate's ABC's for the text. It is suggested NOT to put vinyl over the glitter vinyl.... I tried it and it did NOT work... however... if you layer glitter vinyl over glitter vinyl it does work!!! I was so excited for this look. I let the pink of the shirt show through so I only used silver and black glitter iron-on vinyl.
For the shirt "Picture Perfect" and for her pants "Perfect Princess"
I thought the little crowns were a cute way to tie in the "Princess" theme.
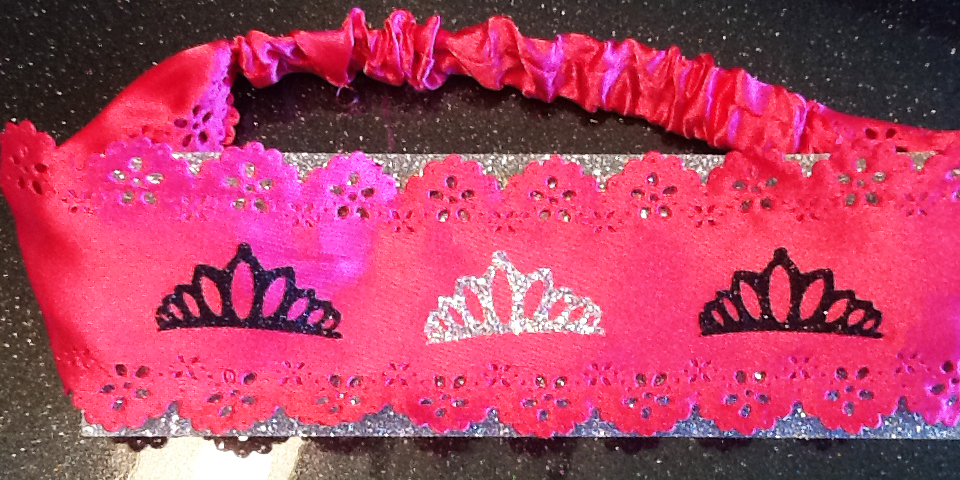
Here is her matching headband. I added the silver behind it, just for the photo.
The original design was just the "Picture" frame. But I wanted to personalize it a bit! I LOVE using Cricut Craft Room to make exactly what I want and like no one else has made! I am happy to share it though :)
Tutorial (recap) from Erica
My biggest tip... don't forget to FLIP the design, there is a button to do so on the expression, if you are using Craft Room scroll below to see that button to FLIP. I would even recommend putting a post it note on your machine that says FLIP, that way before you load your paper/vinyl you will remember to check if it was flipped. In one evening I forgot 4 times to flip the design and wasted my vinyl.
Here is the design that I started with in Cricut Craft Room, it is from Boho Graphics
To make it your own click on the image until the grey box appears around the design then select the HIDE CONTOUR (I circled it in purple for you)
From there you can select to hide any lines that you want.
If it is red when you click that is the line that will "disappear"
Don't worry if you make a mistake, just click that line again and it will reappear....
I just LOVE Cricut's Craft Room!!!
After I selected all of the line that I wanted to hide I click the EXIT button right where the HIDE CONTOUR button was.
Here is my image with the lines hidden....
I flipped this design then I cut it out of Cricut iron-on lite vinyl.
Next I went back into the HIDE CONTOUR and i hide the letters L V E then i clicked on the heart image below to make it reappear. I FLIPPED the design and cut it from the Cricut iron-on glitter vinyl.
Don't for get to FLIP your image before cutting. There is a purple circle around the FLIP left to right (or some people call it mirror function)

Helpful links.....
Here are some of the links that I talked about during Ustream....
The Cricut Iron-on Vinyl and Cutting Fabric with the Cricut Ustream broadcast.
At 7:00pm EST until 10:00pm EST on Saturday April 13, 2013
My Ustream channel
Kiss Cut Settings
Logo Placement Guide
Brooklyn Images
The Boho Graphics images
Click here to
Get $15 off your Cricut Iron-on Sample Pack!
Boho Graphics used for this tutorial.

Brooklyn Iron-On
The First Few Years
Here is a newer Cricut cartridge called The First Few Years.
This is a great cartridge especially if you don't know where to start when it comes to scrapbook layouts... it has complete scrapbook layouts in it.... It takes the guess work out of scrapbook layouts!!!
.jpg)
DESIGN TEAM CALL!!!!
A spot on this design team could be a great opportunity for people to see your projects each day and each week. We are about to get VERY busy.... top secret stuff!!!
VERY Soon we will be sharing some sneak peeks of upcoming Cricut items before they are released.... After they approve the picture of course!
This design team term is May to the end of November.
As a part of the team,
you will need to make one post a week on your blog in correlation with this blog.
You will also need to participate in our 100 Cricut cartridge blog hop the first Saturday of each month. You will get a blinkie for your blog and your blinkie
(if you have one) will go on my blog here, on this blog.
I am looking for a few beginners, a few intermediate and a few highly talented people. The main thing that I am looking for is for you to show your work and give a detailed description so anyone can replicate your project no matter how simple or advanced your project is.
The general rules of my blog and facebook are to share Cricut projects in a positive way.
We promote the use of Cricut cartridges and but we do not SVG images.
I also like you to use actual stamps and not digi stamps.
Please put the subject DESIGN TEAM CALL
Please include:
1. Your name
2. What country and time zone you live in
3. Blog address (you have to have a blog, feel free to create one)
4. A link to your favorite project you have made. If you have not posted it anywhere, you may attach a picture of it in the email.
5. Your project must use cricut cartridges.
6. List any other design teams if you are on one or have been on.
7. Your facebook name (if you have one)
8. Then tell me why you would love to me on this design team!
Submission deadline is
Sunday, May 5, 2013 11:59pm PST




.jpg)