Craftsy Unlimited FREE 7 day trial at Craftsy.com
Happy Cloud Quilt Batting by Fat Quarter Shop
Cricut is Easy as 123
Loralie Designs

Thursday, January 8, 2015

Origami Owl, Valentine's collection, now on sale!!!

Valentine's Day
 
VALENTINES DAY 2015 COLLECTION! AVAILABLE NOW!
THESE LIMITED EDITION PIECES WILL GO FAST!
VIEW ENTIRE COLLECTION AT
http://ericasmole.origamiowl.com/
SOOOO darn cute!!!

Order Code        EricaSmole585459


Crystals by Swarovski


Limited Edition Charms
 
Hostess Exclusive

Saturday, January 3, 2015

Thursday December 25, 2014 with My Cricut Craft Room and Design Team- Presents


Thursday December 25, 2014 with My Cricut Craft Room and Design Team-  Presents

Merry CHristmas everyone.  I hope that you are having a wonderful holiday filled with family anad friends.  For this project I will show you how I made this infinity light for my daughter for a gift.  They are very easy and fun to make.  This is a cheaper alternative to the expensive ones you find at the mall.
Materials Needed:
15 plastic file folders
Lamp pattern


I bought 15 plastic file folders from my local dollar store and cut them in half and cut out the pockets.


I downloaded this pattern I found in this Facebook group.  Go here to find the pattern.

https://www.facebook.com/groups/ChristopherAlanDesigns


I cut out the pieces in Design Space. You can fit 2 pieces on one side of each folder if you size each pattern at 6.5" width.  The length will automatically size along with the height when you size in Design Space.  This will make an 11.5" diameter lamp.   I cut out 7 in one color and 8 in another.
I then went to you tube and search for infinity lights to see a video on how to piece the lamps together.  There are many videos to choose from.  I followed along with the videos and put the lamp together.  It is easy once you get the hang of it.


I found a light cord at the local dollar store to insert into the lamp.  The instructional videos show you how to insert the lamp cord.  I replaced the bulb in the cord with a cooler night light bulb to prevent the plastic for getting to hot and melting.


I put this light together in less than an hour after I figured out how to piece it together.  It is totally doable with a little patience.  And it looks so awesome lit up.  My daughter loved it!


 Please join my facebook page to see more projects and tips.
facebook.com/countrysidecottageretreatjects and tips.

Go On!  Craft On!
 

Monday, December 22, 2014

Monday December 22, 2014 with My Cricut Craft Room and Design Team- Traditions


Monday December 22, 2014 with My Cricut Craft Room and Design Team- Traditions

Rebecca created this wonderful Family Tree for a holiday gift to symbolize the traditions in our lives. 
You can check out how she created this on her blog: http://queenmommiedom.blogspot.com


Tuesday, December 16, 2014

Tuesday December 16, 2014 with My Cricut Craft Room and Design Team- Use Silvers


Tuesday December 16, 2014 with My Cricut Craft Room and Design Team- Use Silvers

Happy holidays everyone!  If you are like me, you are probably trying to watch your spending around the holidays.  Last year we decided to make it a standing rule among the adults in our family.  Hand made presents only.  We had such a great time making and recieving our gifts.  The thought and effort that was put into the gift selection and creating made it very special, both for the giver and for the one receiving the gift. I know that we all felt the love that we have for each other in each gift.  One of my gifts this year is a set of etched stemless wine glasses for my Mother.  She loves owls, so I went with an silver owl theme. 

Materials needed
4 clear glasses
Armour Etch etching cream
Scrap pieces of vinyl


First I picked out four different types of owls from the Cricut cartridge "Hoot n Holler".  I loaded each owl into Design Space.  I needed to do a little tweaking to get them to cut out the way I wanted.  I first ungouped each owl, got them the way I wanted and then attached them.  You may need to experiment to get the right cut.


I cut each owl out of vinyl, and then weeded the vinyl.  I weeded out the part that I wanted to have etched on the glass.  I then applied the vinyl to the glasses. I bought my glasses at the dollar store.  They have lots of different styles and the price is right.


I used a product called Armour Etch to etch the glass.  You can find this product at any craft store.


I applied the cream to the glass, over the vinyl stencil.  I applied it liberally, and periodically brushed the cream over the vinyl to make sure everything was covered.  I left the cream on for 20 minutes.  The directions say to leave on for 5 minutes, but I wanted to make sure that the cream really took a hold! Be careful though, if you get even a tiny bit on any part of the glass, it will leave an etching mark.  Make sure to have a paper towel handy to wipe any cream off if it isn't where it is suppose to be.


After the alloted time, I washed the glasses under warm water to remove ALL of the cream.  I then wiped each glass off and voila!

Here is the finished project.  It is so easy!  

Please join my facebook page to see more fun projects!
Have a great holiday everone, and 
Go On! Craft On!

Saturday, December 13, 2014

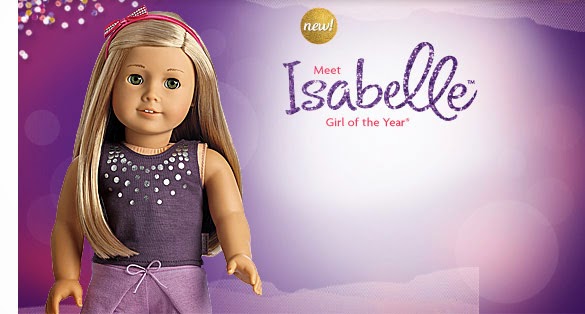
Thank you for joining us on My Cricut Craft Room's American Girl Blog Hop

 
Thank you for joining us on My Cricut Craft Room's American Girl Blog Hop
 
Bella turned 7 yesterday!!! Here are the invites and some pictures from her party and a few other graphics that I didn't end up using but I thought they were cute. We even had goodie bags for the girls' dolls. I put four bundles of grapes that we found in the summer for $.01 each! Great deal on those! I hope you enjoy our share and stop at the next two blogs to see more American Girl fun!


Next you will go to Jen's Blog 


Start
1. Start- http://mycricutcraftroom.blogspot.com
2.  Rebecca - http://queenmommiedom.blogspot.com
3.  Jen - http://www.100Directions.com/
4.  Craft Lovers Come Here- http://CraftLoversComeHere.blogspot.com

Friday, December 12, 2014

Friday December 12, 2014 with My Cricut Craft Room and Design Team- Penguins


Friday December 12, 2014 with My Cricut Craft Room and Design Team-  Penguins

Lynn used Create a Critter 2 and Simply Charmed to create this card.
If you would like more information about this cute card please visit her blog by clicking here


Tuesday, December 9, 2014

Tuesday December 9, 2014 with My Cricut Craft Room and Design Team- Stars


Tuesday December 9, 2014 with My Cricut Craft Room and Design Team- Stars

Today Jen Goode is sharing a paper star ornament you can create with your Cricut. This pretty little 3D star is simple to make and Jen offers a free SVG file you can download and use in Cricut Design Space! She also shows you how to make the little beads... To view the whole Paper Star Ornament tutorial, visit Jen's site, 100 Directions.


Monday, December 8, 2014

Monday December 8, 2014 with My Cricut Craft Room and Design Team- Gingerbread


Monday December 8, 2014 with My Cricut Craft Room and Design Team- Gingerbread

Lynn used Cricut Design Space and Create a Critter 2 to create this gingerbread scene on her card. You can get more information at her blog, My Cards 'N Stuff.